There is nothing so nerve-wracking as walking to your car on a bright sunny day and seeing swirls of paint marks and blemishes. Now your whole day is ruined, and oh well, your favorite vehicle’s image too.
What are they exactly? Swirl marks appear on the clear coat’s surface like fine marrings; in other words, they are microscopic scratches. Even though they sound like no big deal, sometimes they can be difficult to remove.
So now comes another question, how did they get there in the first place. You might be surprised that swirl marks are caused by inadequate cleaning or using the wrong technique in most cases. If you aren’t wiping your vehicle the right way, you might be creating swirl marks every time you do it.
But now, when the damage is done, is there no way back? – Yes, there is! And we are going to give you a complete guide on how to remove swirl marks and make your favorite four-wheel toy look brand new.
Methods to Remove Swirl Marks
Professional repainting
First of all, you need to determine how severe the problem is, in other words, to gauge its depth. To do so, move over them with your nails; if they dip inside, then the marks are rather deep, and they might need professional repainting of the scratched areas.
Even though this isn’t expensive, you’ll require experience. So, the other alternative is a more cost-effective method which is polishing by hand.
Removing swirl marks by hand
If the marks are shallow, you can use an electric polisher or remove them away by hand. The electric polisher quickly removes the marks through rotation movement that heats the top coat of the paintwork and melts it a bit. Then the melted paint flows into the scratched areas and fills them up. However, this method isn’t recommended to be done too often.
Read more: How to Remove Spray Paint From a Car
Simple Technique How to Remove Swirl Marks by Hand
If you are a beginner, you don’t have to worry since our technique is especially simple and comprehensive; all you need to do is follow the steps carefully and choose the right products. We are going to break the guide into a few simple steps and educate you on what action you need to prevent the problem with swirl marks from happening again.
This method requires using car polish which is an abrasive that can smooth and flatten the paintwork by removing the scratches, marks, and blemishes. It provides a protective layer by creating a barrier.
You don’t have to worry about this abrasive causing more scratches since they aren’t too harsh; in fact, you can buy different abrasive levels that suit your vehicle’s exterior.
To get started, you need:
- Your choice of car wash and polish products
- 3x microfibre cloths
- Pair of disposable nitrile gloves
The technique
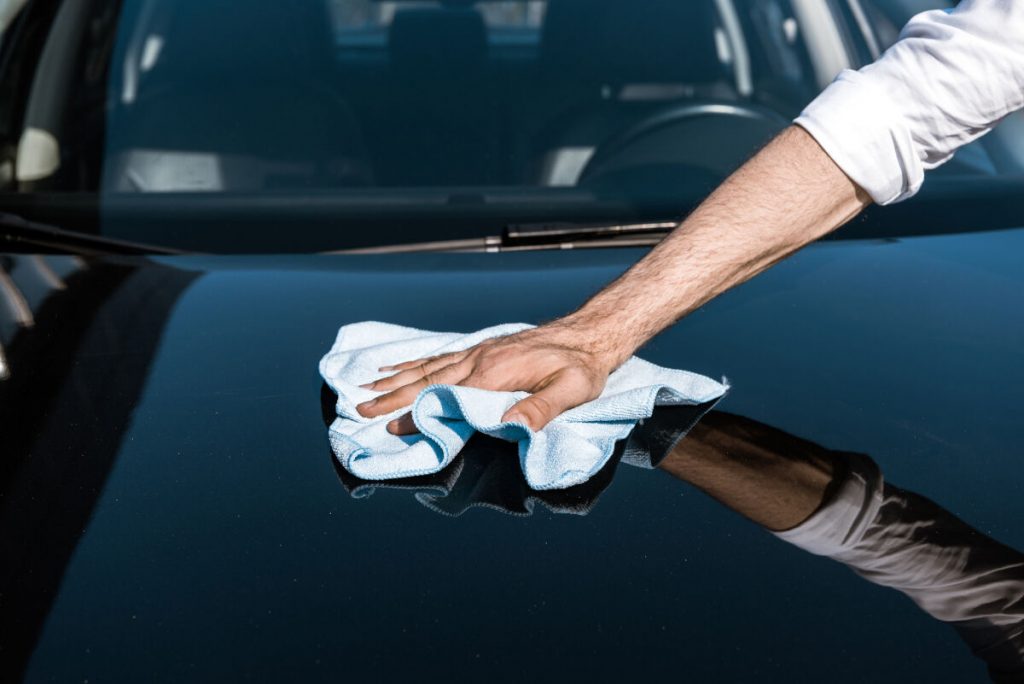
Wash
Before polishing, the first and most important step is to wash your vehicle throughout. This will prevent dirt and grime from getting stuck on your applicator pad and causing more scratches on your pain.
Use good quality car detergent, start from the top of your vehicle, then work down cleaning all the panels. Rinse out your wash mitt, and then apply more soap. When you are done washing, rinse all the excess soap and dirt and dry your vehicle using a microfiber towel.
Decontaminate
Before moving on to the polishing, you must remove the iron contamination. Move your car into a shaded area and spray all painted surfaces, then let it dry for a few minutes.
After a few minutes, you’ll notice purple spots around your vehicle surface; this is just the contamination breaking down. Rinse after five minutes and then dry it using a microfiber cloth.
Then you can move on to claying; however, you can skip this process if the surface feels completely smooth at this point. Take your clay pad and spray some clay tubes on both the clay and the vehicle’s surface.
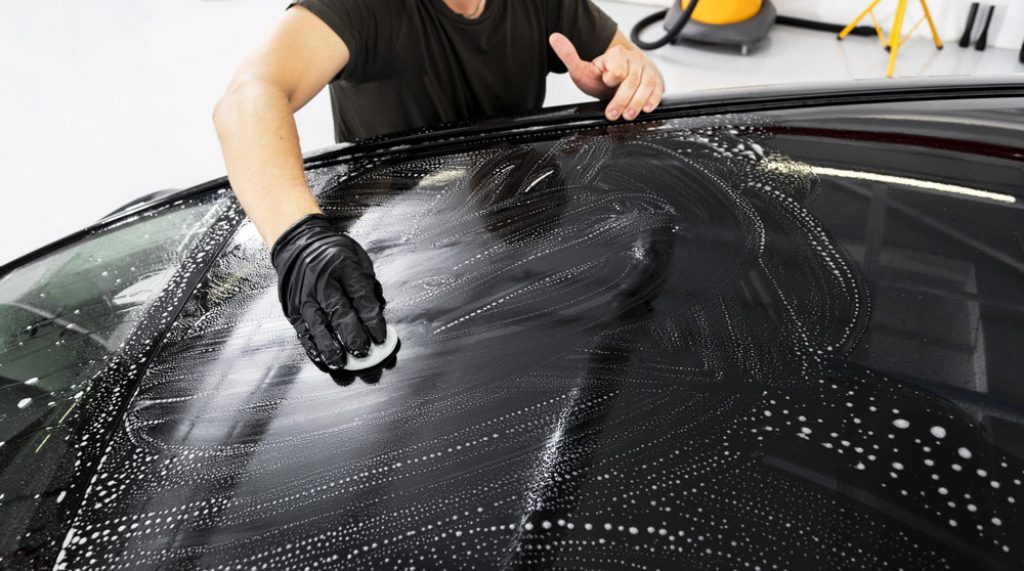
Polish
After your car is clean and dry, apply polish onto a clean damp microfiber cloth and apply it evenly to the scratched bodywork using circular motions. Continue to work this way with light to medium pressure. Repeat this process on all panels until it’s complete.
Make sure to work with one panel at a time. This will ensure an even covering.
Apply wax
Polishing your vehicle should always be finished by applying a wax or sealant. They will prevent dirt and debris from selling on the pain and add hydrophobic protection and make the pain perfectly shiny.
Put the was on a microfibre cloth using a thin layer and apply it to the surface using overlapping circular motions. Wait for the wax to dry from 3 to five minutes, then buff it off using a clean cloth.
Read more: How Often Should You Wax Your Car
Issues That Might Cause Swirl Marks
Now when you know how to remove swirl marks, you need to know what creates them and what you need to do to prevent them from appearing again.
To keep things simple, they are caused by improper touching of your painted surface, like wiping clean paint using a dirty towel. This is similar to rubbing sandpaper on your skin.
Creating swirl marks might result from anything from improperly washing your car or automatic washes. With time this action will cause friction and multiply into thousands, resulting in a swirl mark appearance.
In most cases, vehicles that go under automatic washing regularly are most prone to develop swirl marks.
Conclusion
After so many hacks and tricks available on the internet, there is no need for you to break out in cold sweat whenever you see a swirl mark on your car. All you need is to get good products that will do the job and take your time in the process.
Luckily, you won’t have to spend days removing them, as we found the fastest and easiest technique that can help you remove them.
However, the most important thing is to make sure you avoid the action that actually causes these swirl marks on your paint surface.